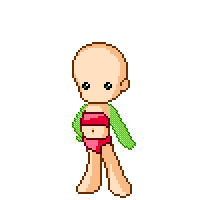
Sleeve Tutorial
Official site resource (Tutorials)
Dear pixel artists,
As you may have noticed, our dolls support a number of different arm poses. While they are very cool to have, it makes it a lot harder on those of you who want to do tops with sleeves. This tutorial should help you make new ones or fix the ones you made before.
We may ask you to enable your items for any new poses that may be added, so be sure to save everything carefully, preferably in a format that preserves layers (like the one used by your drawing program).

The other layers correspond to the poses of the arms. Left and right sleeves should be submitted separately, for the "arms crossed" pose both sleeves need to be submitted on the same layer. If the sleeve pose causes extra folds on the torso part you can draw them on the sleeve layer, overlap is fine. These are the arm poses that are currently available (the arms move independently, so there are actually more):
Update: new arm poses as of January 9, 2010:
Long sleeves example
Ideally, and for the case when your item has long sleeves, you'll end up submitting the following layers as separate images:
- Torso
- Left arm down sleeve
- Right arm down sleeve
- Left arm side sleeve
- Right arm side sleeve
- Left arm behind head sleeve
- Right arm behind head sleeve
- Peace sign right sleeve
- Arms crossed both sleeves
And new arm poses as of January 9, 2010:
- Behind back left sleeve
- Behind back right sleeve
- Fight pose left sleeve
- Fight pose right sleeve (might be able to re-use right side sleeve)
- Thumbs up right sleeve (might be able to re-use peace sign right sleeve)
- Thoughtful left sleeve
- Mouth cover left sleeve
- Inquiry left sleeve
- Magical girl pose right sleeve
- Fingers together pose both sleeves
Short sleeves example
If you item has short sleeves, it's possible to take a short cut because sleeves can be reused for different poses. It's probably still better to have custom sleeves for all poses, though. You should check if the arms are covered by your sleeves (unless it's hardly noticeable). At least, you should submit the following layers:
- Torso
- Left arm down sleeve
- Right arm side sleeve (should also work for the right arm down pose)
- Left arm behind head sleeve
- Right arm behind head sleeve
For items with (very) short sleeves, there can be some cases where the item somehow already works for all poses. Check if this is the case before starting the work described above! And if you wanted to make gloves (the current ones won't work with the poses) the same procedure needs to be followed as for long sleeves. But unless they are very special gloves, I'd rather you waited for me to make some standard ones.
I hope it was helpful, feel free to post questions in the comment box!
...
*faints*
'cause it help a lot to look at them even if you change the forum background :3
or ... tattoo should be single item?