Hair Tutorial
Official site resource (Tutorials)

As I might have said before, for hair to work, you need to use 2 layers. One will go behind the doll base, one will go over it.
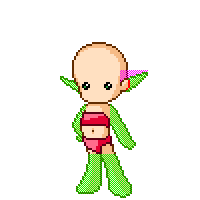
Let's start with the back layer. Look at the picture to the left, the parts of the doll base marked with green are not always there. For example, it's possible to have the following:
For your hair to work for all dolls, you have to draw all the hair that would be behind those green areas (more is also fine).
The easiest thing to do now is to just draw the haircut you wanted to make on top of the doll, including what's behind the green areas. I always draw the lines on one layer, and put a layer with the color underneath. Spend some time making the lines look pretty. Then add shading to the color layer. When you're done, so is the back layer of your hair cut.
For the front layer, copy the whole back layer, lines and coloring, and start erasing everything that would be behind the doll base, leaving just the front part of the hair. This can be tricky. Look at the image on the left again. If you want your hair to go behind the ears, it should also work for elf ears. So in that case, delete everything under the pink area from the front layer.
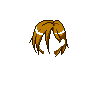
When you're ready to submit your item, save the two hair layers as two separate PNG images with transparent backgrounds. Here is an example:


Of course, if your hair is too short to have a back layer, you can just submit that one layer.
Feel free to pose questions in the comment box!
i might try to make hairstyles soon
So yes, you have to make it so that it works with human ears and elf ears.
Or else, don't bother making hair.
/new
No shading tutorials on here yet.